DIY Projector – Bring your wall to life!

Project your winter energy into crafting a DIY projector! Perfect for video watching during the school holidays and those wet weather weekends that seem to last forever.
You will need
- A magnifying glass
- A sheet of thin black foam board
- Glue gun
- Craft glue
- Shoebox
- Smart phone
- Stanley knife / craft knife
- Hack saw
- Rule
- Double-sided tape
Step 1: Cut the handle off the magnifying glass. This will be your projector’s lens.
Step 2: Next take your shoebox – lid removed – and reinforce all the inside edges and corners with your craft glue. Make sure it’s especially sturdy and strong at the ends.
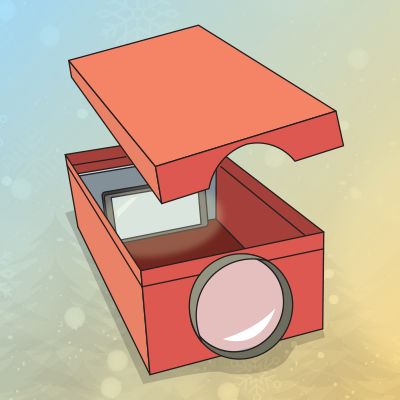
Step 3: After the glue has dried, turn your shoebox up on one end and trace a circle around your magnifying glass at the other end – this will be your lens end.
Step 4: Use your Stanley knife or craft knife to cut around the cardboard circle. Once cut, the cardboard should pop out and your magnifying lens should fit nicely in the hole.
Step 5: Use hot glue to mount the magnifying lens to your cardboard – so it remains in place and doesn’t drop out.
Step 6: Then take the shoebox lid and using your cardboard circle cut-out, trace part of the circle onto the lid and remove. When you put the lid on, your lid will fit snugly around your lens – not over it.
Step 8: For the base of the phone stand, cut another piece of foam board, hot glue it to the other board so that both form a ‘T’ shape – bottom base and vertical centre. Make sure boards are glued perpendicularly to avoid image distortions when the phone is playing.
Step 9: Next, stick two pieces of double-sided tape to your smartphone and mount it centre of your vertical board piece, so your phone aligns itself with the lens of the projector.
Step 10: Now you need to set your phone to the highest, brightest setting and lock your screen so that when you play a video the screen stays upside down. The lens will invert the image on the wall the right way around – voila!
Step 11: The last step is focusing your projector. Place your shoebox projector on a table or cabinet facing the wall or screen you’ll be projecting onto. To gain image focus, move your phone and stand backwards and forwards inside the box. You’ll be able to see where the best position is in the box judging by how clear the image appears on the wall.
Step 12: You are done! Grab a friend or two and settle into your couch for an afternoon of movie watching!